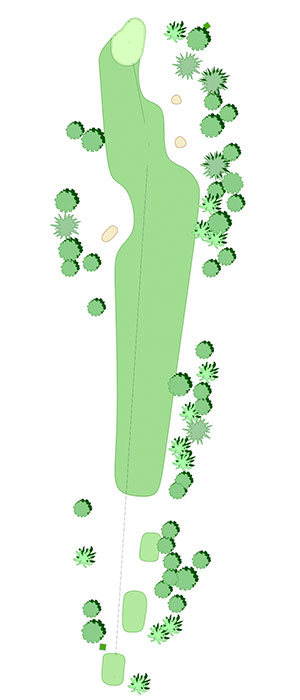
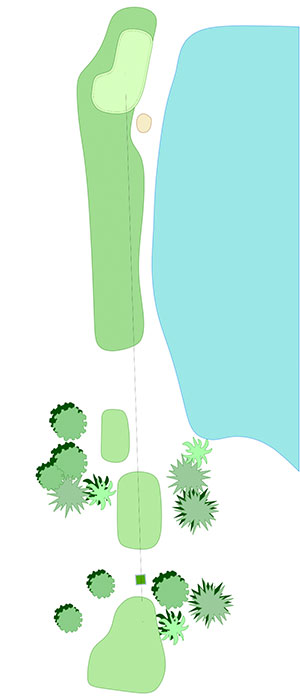
Hole 1
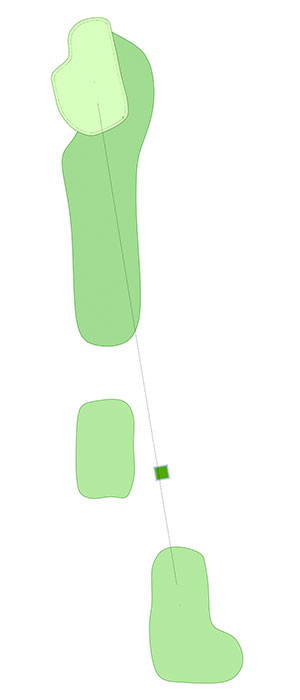
PAR 3
124
90
81
ARTIFICAL MAT
93
Taylor's Tips
This relatively shore par-3 has been designed to help golfers get a good start to their round. The forward tee box is elevated to help the beginner and average players hit their tee shot in the air. Good luck and enjoy, as the test will get harder on the holes to come.
Hole 2
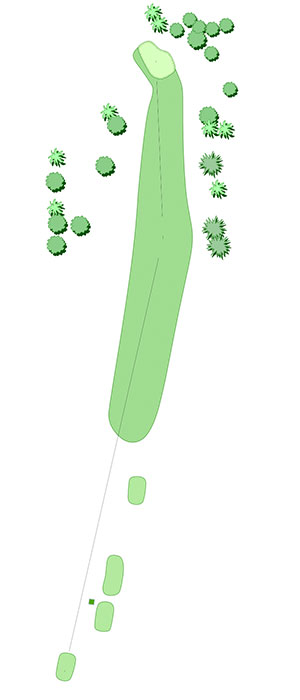
PAR 4
375
343
321
ARTIFICAL MAT
327
Taylor's Tips
The longest par-4 on the course. But don’t try to overpower your drive; the prevailing south wind will help your distance off the tee. The green complex is receptive, but you may need to land your approach shot short of the green, and chase it on, to get it close to the front pin placement.
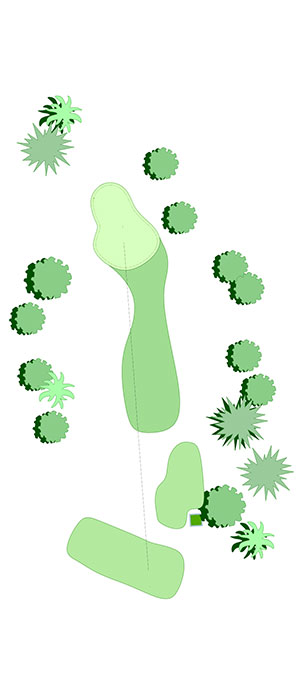
Hole 3
PAR 4
324
292
256
ARTIFICAL MAT
307
Taylor's Tips
Tee shot placement on this shorter par-4 is a premium. The three fairway bunkers need to be avoided, and a heavy crosswind may force to you to hit something less than driver off the tee. If you miss the green but are still in the short grass, consider using your putter to knock it close, or in.
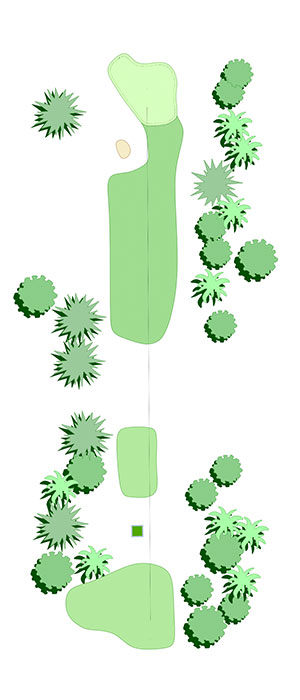
Hole 4
PAR 3
94
74
61
ARTIFICAL MAT
79
Taylor's Tips
The shortest hole on the course, but one of the most picturesque. The green is small but undulating, making it difficult to roll in that birdie putt. The middle left pin sits in a bowl, which is a very receptive location for the ever-elusive hole-in-one!
Hole 5
PAR 3
152
137
112
ARTIFICAL MAT
125
Taylor's Tips
More than meets the eye. The bunker protects the left portion of the green and should be avoided. The green slopes from right to left. Use that slope to maneuver your shot around the bunker, to get your shot close to the back left pin.
Hole 6

PAR 3
197
145
126
ARTIFICAL MAT
171
Taylor's Tips
The longest par-3 on the course is your toughest test yet. Low, running tee shots may be the best route to this green. The mound that is short and right of the green should help feed those low shots toward the pin. Don't forget to use your putter when in the short grass next to the green. Keeping the ball low and rolling is key.
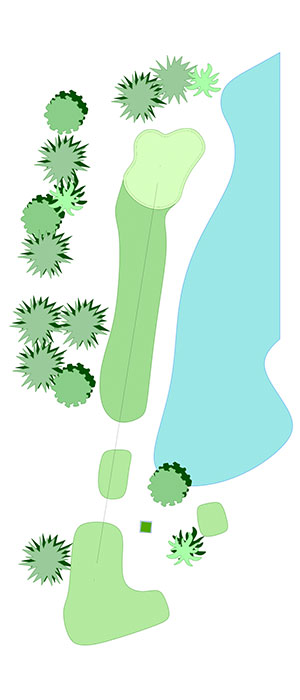
Hole 7

PAR 3
140
126
97
ARTIFICAL MAT
113
Taylor's Tips
The pond comes into play on the last 3 holes. There is a lot of room to the left on this hole to keep your tee shot dry. A strong south wind may force you to land your tee shot short and have it roll onto the green. Any tee shot that is long may end up swimming.
Hole 8
PAR 3
131
112
91
ARTIFICAL MAT
101
Taylor's Tips
The shortest par-3 can bite you. Select your club wisely, and avoid missing right as a big number on the scorecard will certainly be the result. Use the left to right slope of the green to hit your shot close to the right hold location.
Hole 9
PAR 3
176
147
120
ARTIFICAL MAT
161
Taylor's Tips
Consider your options first to avoid the big number on your scorecard.This long par-3 is a great test to end your round. If the wind is up, the best choice may be a conservative route; make sure your tee shot is safe by playing it short and in the fairway. A birdie on this difficult hole will certainly give you bragging rights.
We are high tech
Valley Point Golf Course is available on these GPS Golf Apps for both Apple and Android smartphones and smartwatches. Track your distances to greens from all sides (front, middle and back).
Free and Subscription Apps:
GolfPad, FreeCaddie & Sky Caddie (Use your Sky Caddie GPS finders too)